Smart Email Labeling Agent

Overview

Learn how to build an intelligent email classification agent that uses AI to automatically analyze and label incoming emails. This intermediate example showcases AgentMail’s powerful labeling feature combined with OpenAI’s GPT-4o-mini to create a sophisticated inbox automation system.

What You’ll Build

By the end of this guide, you’ll have a working smart labeling agent that:

  1. Receives incoming emails to a dedicated AgentMail inbox
  2. Analyzes each email with AI across 4 dimensions:
    • Sentiment: positive, neutral, or negative
    • Category: question, complaint, feature-request, bug-report, or praise
    • Priority: urgent, high, normal, or low
    • Department: sales, support, billing, or technical
  3. Automatically applies labels to each email for easy filtering
  4. Handles failures gracefully with retry logic and validation

Here’s what happens when an email arrives:

Email: "Your product crashed! I need help ASAP!"
AI Analysis
Applied Labels:
• negative
• complaint
• urgent
• support

Prerequisites

Before you begin, make sure you have:

Required:

Project Setup

Step 1: Create Project Directory

Create a new directory for your agent:

$mkdir smart-labeling-agent
>cd smart-labeling-agent

Step 2: Create the Agent Code

Create a file named agent.py and paste the following code:

1"""
2Smart Email Labeling Agent
3
4An AI-powered email classification agent that automatically analyzes incoming
5emails across multiple dimensions and applies appropriate labels.
6"""
7
8import os
9import json
10import time
11from dotenv import load_dotenv
12
13load_dotenv()
14
15from flask import Flask, request, Response
16import ngrok
17from agentmail import AgentMail
18from openai import OpenAI
19
20# Configuration
21PORT = int(os.getenv("PORT", "8080"))
22INBOX_USERNAME = os.getenv("INBOX_USERNAME", "smart-labels")
23WEBHOOK_DOMAIN = os.getenv("WEBHOOK_DOMAIN")
24
25# Initialize
26app = Flask(__name__)
27client = AgentMail()
28openai_client = OpenAI()
29
30
31def setup_agentmail():
32 """Create inbox and webhook with idempotency."""
33 # Create inbox
34 try:
35 inbox = client.inboxes.create(
36 username=INBOX_USERNAME,
37 client_id=f"{INBOX_USERNAME}-inbox"
38 )
39 except Exception as e:
40 if "already exists" in str(e).lower():
41 inbox_id = f"{INBOX_USERNAME}@agentmail.to"
42 class SimpleInbox:
43 def __init__(self, inbox_id):
44 self.inbox_id = inbox_id
45 inbox = SimpleInbox(inbox_id)
46 else:
47 raise
48
49 # Start ngrok
50 listener = ngrok.forward(PORT, domain=WEBHOOK_DOMAIN, authtoken_from_env=True)
51
52 # Create webhook
53 try:
54 client.webhooks.create(
55 url=f"{listener.url()}/webhook/agentmail",
56 event_types=["message.received"],
57 client_id=f"{INBOX_USERNAME}-webhook"
58 )
59 except Exception as e:
60 if "already exists" not in str(e).lower():
61 raise
62
63 print(f"Ready: {inbox.inbox_id}\n")
64 return inbox, listener
65
66
67def analyze_email(subject, content):
68 """Use AI to classify email across multiple dimensions with retry logic."""
69 valid_values = {
70 "sentiment": {"positive", "neutral", "negative"},
71 "category": {"question", "complaint", "feature-request", "bug-report", "praise"},
72 "priority": {"urgent", "high", "normal", "low"},
73 "department": {"sales", "support", "billing", "technical"}
74 }
75
76 for attempt in range(1, 4):
77 try:
78 if attempt > 1:
79 time.sleep(1)
80
81 response = openai_client.chat.completions.create(
82 model="gpt-4o-mini",
83 messages=[
84 {
85 "role": "system",
86 "content": "You are an expert email classifier. Analyze emails and return structured classifications."
87 },
88 {
89 "role": "user",
90 "content": f"""Analyze this email across 4 dimensions:
91
92 Subject: {subject}
93 Content: {content}
94
95 Classify into:
96 1. sentiment: positive | neutral | negative
97 2. category: question | complaint | feature-request | bug-report | praise
98 3. priority: urgent | high | normal | low
99 4. department: sales | support | billing | technical
100
101 Consider:
102 - Sentiment: Overall tone and emotion
103 - Category: Primary intent of the email
104 - Priority: Urgency indicators (ASAP, urgent, immediately, deadline mentions, emergency)
105 - Department: Best team to handle this
106
107 Return ONLY valid JSON with these exact keys: sentiment, category, priority, department.
108 Example: {{"sentiment": "positive", "category": "question", "priority": "normal", "department": "sales"}}
109 """
110 }
111 ],
112 response_format={"type": "json_object"},
113 temperature=0.3
114 )
115
116 # Parse and validate
117 result = json.loads(response.choices[0].message.content)
118
119 required_keys = ["sentiment", "category", "priority", "department"]
120 missing_keys = [key for key in required_keys if key not in result]
121 if missing_keys:
122 raise ValueError(f"Missing keys: {missing_keys}")
123
124 invalid_values = []
125 for dimension, value in result.items():
126 if dimension in valid_values and value not in valid_values[dimension]:
127 invalid_values.append(f"{dimension}={value}")
128
129 if invalid_values:
130 raise ValueError(f"Invalid values: {', '.join(invalid_values)}")
131
132 return result
133
134 except Exception as e:
135 if attempt == 3:
136 raise Exception(f"AI classification failed: {e}")
137
138
139def apply_labels(inbox_id, message_id, classifications):
140 """Apply labels based on classification results."""
141 labels = [
142 f"{classifications['sentiment']}",
143 f"{classifications['category']}",
144 f"{classifications['priority']}",
145 f"{classifications['department']}"
146 ]
147
148 # Try batch first
149 try:
150 client.inboxes.messages.update(
151 inbox_id=inbox_id,
152 message_id=message_id,
153 add_labels=labels
154 )
155 for label in labels:
156 print(f" ✓ {label}")
157 return
158 except Exception:
159 pass
160
161 # Try individually
162 successful = []
163 for label in labels:
164 try:
165 client.inboxes.messages.update(
166 inbox_id=inbox_id,
167 message_id=message_id,
168 add_labels=[label]
169 )
170 successful.append(label)
171 print(f" ✓ {label}")
172 except Exception:
173 print(f" ✗ {label}")
174
175 if not successful:
176 raise Exception("Failed to apply labels")
177
178
179@app.route('/webhook/agentmail', methods=['POST'])
180def receive_webhook():
181 """Webhook endpoint to receive incoming email notifications."""
182 try:
183 payload = request.json
184 event_type = payload.get('type') or payload.get('event_type')
185
186 # Ignore outgoing messages
187 if event_type == 'message.sent':
188 return Response(status=200)
189
190 message = payload.get('message', {})
191 message_id = message.get('message_id')
192 inbox_id = message.get('inbox_id')
193 from_field = message.get('from_', '') or message.get('from', '')
194
195 # Validate required fields
196 if not message_id or not inbox_id or not from_field:
197 return Response(status=200)
198
199 # Extract sender email
200 if '<' in from_field and '>' in from_field:
201 sender_email = from_field.split('<')[1].split('>')[0].strip()
202 else:
203 sender_email = from_field.strip()
204
205 subject = message.get('subject', '(no subject)')
206 email_body = message.get('text', '') or message.get('body', '') or message.get('html', '')
207
208 # Log
209 print(f"\n📧 {sender_email}: {subject}")
210
211 # Analyze
212 classifications = analyze_email(subject, email_body)
213
214 print(f" Sentiment: {classifications['sentiment']}")
215 print(f" Category: {classifications['category']}")
216 print(f" Priority: {classifications['priority']}")
217 print(f" Department: {classifications['department']}")
218
219 # Apply labels
220 apply_labels(inbox_id, message_id, classifications)
221 print("Done\n")
222
223 except Exception as e:
224 print(f"Error: {e}\n")
225
226 return Response(status=200)
227
228
229if __name__ == '__main__':
230 print("SMART EMAIL LABELING AGENT\n")
231 inbox, listener = setup_agentmail()
232 print("Waiting for emails...\n")
233 app.run(port=PORT)

Step 3: Create Requirements File

Create a file named requirements.txt:

agentmail
flask>=3.0.0
ngrok>=1.0.0
python-dotenv>=1.0.0
openai>=1.0.0

Step 4: Install Dependencies

Install the required Python packages:

$pip install -r requirements.txt

Step 5: Configure Environment Variables

Create a .env file with your credentials:

1# AgentMail Configuration
2AGENTMAIL_API_KEY=your_agentmail_api_key_here
3
4# OpenAI Configuration
5OPENAI_API_KEY=your_openai_api_key_here
6
7# Ngrok Configuration
8NGROK_AUTHTOKEN=your_ngrok_authtoken_here
9WEBHOOK_DOMAIN=your-domain.ngrok-free.app
10
11# Agent Settings
12INBOX_USERNAME=smart-labels
13PORT=8080

Code Walkthrough

Let’s understand how the agent works by breaking down the key components.

Architecture Overview

Email arrives → AgentMail → Webhook → ngrok → Flask → AI Analysis → Apply Labels

1. Initialization

1# Load environment variables first
2load_dotenv()
3
4# Initialize three clients
5app = Flask(__name__) # Web server for webhooks
6client = AgentMail() # AgentMail SDK
7openai_client = OpenAI() # OpenAI for AI classification

2. Setting Up Infrastructure

The setup_agentmail() function creates your inbox and webhook:

1# Create inbox with idempotency
2inbox = client.inboxes.create(
3 username=INBOX_USERNAME,
4 client_id=f"{INBOX_USERNAME}-inbox" # Prevents duplicates
5)
6
7# Start ngrok tunnel (localhost → public URL)
8listener = ngrok.forward(PORT, domain=WEBHOOK_DOMAIN)
9
10# Register webhook with AgentMail
11client.webhooks.create(
12 url=f"{listener.url()}/webhook/agentmail",
13 event_types=["message.received"],
14 client_id=f"{INBOX_USERNAME}-webhook"
15)

Idempotency with client_id:

Using client_id ensures you can safely restart the agent without creating duplicate inboxes or webhooks. If a resource already exists, AgentMail returns the existing one.

3. AI-Powered Email Analysis

The analyze_email() function is the core of the agent:

1def analyze_email(subject, content):
2 # Define valid classification values
3 valid_values = {
4 "sentiment": {"positive", "neutral", "negative"},
5 "category": {"question", "complaint", "feature-request", ...},
6 "priority": {"urgent", "high", "normal", "low"},
7 "department": {"sales", "support", "billing", "technical"}
8 }
9
10 # Retry up to 3 times
11 for attempt in range(1, 4):
12 try:
13 # Call OpenAI API
14 response = openai_client.chat.completions.create(...)
15
16 # Parse JSON response
17 result = json.loads(response.choices[0].message.content)
18
19 # Validate keys and values
20 # ... validation logic ...
21
22 return result
23 except Exception as e:
24 if attempt == 3:
25 raise

Key features:

  1. Structured prompt: Clearly defines the 4 classification dimensions
  2. JSON mode: Forces OpenAI to return valid JSON
  3. Retry logic: Automatically retries up to 3 times on failures
  4. Strict validation: Ensures classifications match expected values
  5. Low temperature (0.3): Consistent, predictable classifications

Example OpenAI prompt:

Analyze this email across 4 dimensions:
Subject: Product keeps crashing!
Content: Your software is terrible. Fix it ASAP!
Classify into:
1. sentiment: positive | neutral | negative
2. category: question | complaint | feature-request | bug-report | praise
3. priority: urgent | high | normal | low
4. department: sales | support | billing | technical
Return ONLY valid JSON...

AI Response:

1{
2 "sentiment": "negative",
3 "category": "complaint",
4 "priority": "urgent",
5 "department": "support"
6}

4. Applying Labels

The apply_labels() function applies labels with a two-tier strategy:

1# Create labels from classification values
2labels = [
3 "negative",
4 "complaint",
5 "urgent",
6 "support"
7]
8
9# Try batch application first (most efficient)
10try:
11 client.inboxes.messages.update(
12 inbox_id=inbox_id,
13 message_id=message_id,
14 add_labels=labels # Apply all at once
15 )
16 return
17except Exception:
18 pass # If batch fails, try individually
19
20# Apply labels one by one
21for label in labels:
22 try:
23 client.inboxes.messages.update(
24 inbox_id=inbox_id,
25 message_id=message_id,
26 add_labels=[label] # One at a time
27 )
28 except Exception:
29 pass # Log failure but continue

Why two tiers?

  1. Batch first: Fastest approach (1 API call for all labels)
  2. Individual fallback: If batch fails, try each label separately to save what we can
  3. Resilient: Won’t fail completely if one label has an issue

5. Processing Webhooks

The receive_webhook() function orchestrates everything:

1@app.route('/webhook/agentmail', methods=['POST'])
2def receive_webhook():
3 payload = request.json
4
5 # Ignore outgoing messages (prevents infinite loops)
6 if event_type == 'message.sent':
7 return Response(status=200)
8
9 # Extract email data
10 message_id = message.get('message_id')
11 inbox_id = message.get('inbox_id')
12 sender_email = extract_email(from_field)
13 subject = message.get('subject')
14 email_body = message.get('text')
15
16 # Classify with AI
17 classifications = analyze_email(subject, email_body)
18
19 # Apply labels
20 apply_labels(inbox_id, message_id, classifications)
21
22 # Always return 200 (tells AgentMail we received it)
23 return Response(status=200)

Why always return 200?

Even if classification or labeling fails, we return 200 to tell AgentMail: “I received this webhook.” If we returned an error (400/500), AgentMail would retry sending the webhook, which doesn’t help with application errors.

Running the Agent

Start the agent:

$python agent.py

You should see output like this:

SMART EMAIL LABELING AGENT
Ready: smart-labels@agentmail.to
Waiting for emails...
* Running on http://127.0.0.1:8080

Success! Your agent is now running and ready to classify emails.

Leave this terminal window open - closing it will stop the agent.

Testing Your Agent

Let’s test the agent with different types of emails to see how it classifies them.

Example 1: Urgent Complaint

Send this email:

To: smart-labels@agentmail.to
Subject: Product crashed - need immediate help!
Body: Your product is TERRIBLE! It crashed 3 times today and I lost all my work.
I need this fixed IMMEDIATELY or I want a full refund!

Console Output:

you@example.com: Product crashed - need immediate help!
Sentiment: negative
Category: complaint
Priority: urgent
Department: support
✓ negative
✓ complaint
✓ urgent
✓ support
Done

Why this classification?

  • Sentiment: negative (words: “terrible”, “lost work”)
  • Category: complaint (expressing dissatisfaction)
  • Priority: urgent (keywords: “IMMEDIATELY”, “crashed 3 times”)
  • Department: support (product issue)

Example 2: Feature Request

Send this email:

To: smart-labels@agentmail.to
Subject: Dark mode would be amazing!
Body: Hi! I absolutely love your product. I use it every day.
One feature that would make it even better is dark mode support.
Keep up the great work!

Console Output:

you@example.com: Dark mode would be amazing!
Sentiment: positive
Category: feature-request
Priority: normal
Department: technical
✓ positive
✓ feature-request
✓ normal
✓ technical
Done

Why this classification?

  • Sentiment: positive (words: “love”, “amazing”, “great work”)
  • Category: feature-request (suggesting new functionality)
  • Priority: normal (no urgency indicators)
  • Department: technical (feature implementation)

What Happens Next?

View in Dashboard

Go to your AgentMail inbox and filter by labels to organize your emails:

Test image

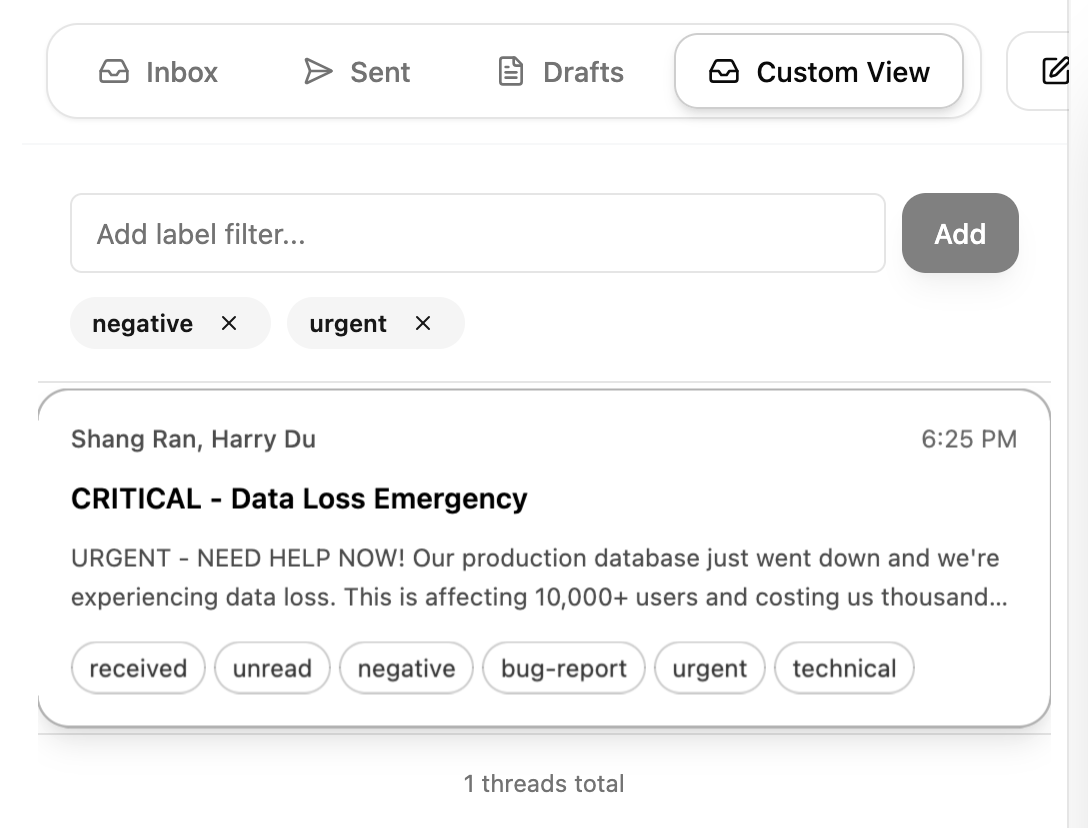
Filter by sentiment:

  • Search negative to see all unhappy customers
  • Search positive to find praise and testimonials
  • Search neutral to review informational emails

Filter by priority, by department…

Combine filters for powerful queries:

  • urgent + negative → Critical customer issues
  • sales + high → Hot leads requiring fast response
  • technical + bug-report → Engineering backlog

Pro tip: You can use AgentMail’s API to programmatically fetch emails by labels and build custom workflows, dashboards, and analytics.

Building on Labels

Once your emails are automatically labeled, you can build powerful automation on top:

Example 1: Priority Notifications

Scenario: Alert your team instantly when urgent issues arrive.

When an email is labeled urgent + negative, automatically send a Slack notification to your support channel. Include the sender’s email and subject line so your team can respond immediately. This ensures critical customer issues never slip through the cracks.

Example 2: Sentiment Escalation

Scenario: Escalate negative sentiment to management.

Track all emails labeled negative and automatically notify customer success managers when sentiment trends downward. If a single customer sends 3+ negative emails in a week, trigger a personal outreach from leadership to address their concerns proactively.

Example 3: Department Routing

Scenario: Auto-forward emails to the right team.

Create rules that automatically forward emails based on department labels:

  • sales → Forward to sales@yourcompany.com
  • billing → Create a ticket in your billing system
  • technical → Post to #engineering Slack channel
  • support → Add to support queue with appropriate SLA

Example 4: Smart Auto-Reply

Scenario: Send contextual automated responses.

Instead of generic auto-replies, craft responses based on classification:

  • question → “Thanks for your question! We’ll respond within 24 hours.”
  • bug-report → “Thanks for reporting this. Our engineering team has been notified.”
  • complaint → “We’re sorry to hear that. A senior support agent will contact you within 4 hours.”
  • feature-request → “Great idea! We’ve added this to our product roadmap.”

Example 5: Analytics Dashboard

Scenario: Track email metrics and trends.

Build a dashboard that queries emails by labels to analyze:

  • Sentiment trends: Are customers getting happier or more frustrated?
  • Volume by department: Which team is handling the most emails?
  • Response times by priority: Are you meeting SLAs for urgent issues?
  • Common categories: What are customers asking about most?

Use this data to identify bottlenecks, improve processes, and make data-driven decisions about staffing and product priorities.


Congratulations! You’ve built an AI-powered email classification system. This agent showcases how AgentMail’s labeling feature can power sophisticated inbox automation and analytics.