Messages

The fundamental unit of communication for your agents.

What is a Message?

In the AgentMail ecosystem, a Message is the API-first representation of a traditional email. It’s a structured object containing all the elements you’d expect: a sender, recipients, a subject line, and the body of the email.

Every Message lives inside a Thread to keep conversations organized. When you send a new Message, a new Thread is created. When you reply, the new Message is added to the existing Thread. Literally a normal email thread as we now it.

One of the powerful features of AgentMail is the ability to seamlessly include humans in agent-driven conversations. You can cc or bcc a real person on any message your agent sends, creating a “human-in-the-loop” workflow for oversight, escalations, or quality assurance.

Core Capabilities

You can interact with Message resources in several ways, from sending new Messages to listing a history of correspondence.

1. Initialize the Client

First, you need to initialize the AgentMail client with your API key. This client object is your gateway to interacting with the AgentMail API.

1from agentmail import AgentMail
2
3client = AgentMail(api_key="YOUR_API_KEY")

2. Send a New Message

To start a new conversation, you can send a Message from one of your inboxes. This action will create a new Thread and return the Message object.

1# You'll need an inbox ID to send from.
2# Let's assume we have one:
3
4sent_message = client.inboxes.messages.send(
5inbox_id = 'my_inbox@domain.com',
6to = 'recipient@domain.com',
7labels=[
8"outreach",
9"startup"
10],
11subject="[YC S25] Founder Reachout ",
12text="Hello, I'm Michael, and I'm a founder at AgentMail...",
13html="<div dir=\"ltr\">Hello,<br /><br />I'm Michael, and I'm a founder at AgentMail...")
14
15print(f"Message sent successfully with ID: {sent_message.message_id}")

3. List Messages in an Inbox

You can retrieve a list of all Messages within a specific Inbox. This is useful for getting a history of all correspondence.

1all_messages = client.inboxes.messages.list(inbox_id='my_inbox@agentmail.to')
2
3print(f"Found {all_messages.count} messages in the inbox.")
4for message in all_messages:
5print(f"- Subject: {message.subject}")

4. Reply to a Message

Replying to an existing Message adds your new Message to the same Thread, keeping the conversation organized.

1reply = client.inboxes.messages.reply(
2inbox_id = 'my_inbox@domain.com'
3message_id='msg_id',
4text="Thanks for the referral!",
5attachments=[
6SendAttachment(
7content="resume" # this would obviously be your resume content, refer to the attachment section of the core-concepts for more details
8)
9]
10)
11
12print(f"Reply sent successfully with ID: {reply.message_id}")

Note that the inbox_id in reply is different from send, in that this is the inbox_id we are sending FROM. Remember we can have potentially infinite Inboxes to send from, so we need to tell the api which one we are sending from.

5. Get a Message

You can retrieve the details of any specific Message by providing its ID along with the inbox_id it belongs to.

1message = client.inboxes.messages.get(inbox_id = 'my_inbox@agentmail.to', message_id = 'msg_id')
2
3print(f"Retrieved message with subject: {message.subject}")

Crafting Your Message: HTML, Text, and CSS

When sending a Message, you can provide the body in two formats: text for a plain-text version and html for a rich, styled version.

  • text: A simple, unformatted string. This is a fallback for email clients that don’t render HTML, ensuring your message is always readable.
  • html: A full HTML document. This allows you to create visually rich emails with custom layouts, colors, fonts, and images.

Best Practice: Always send both text and html versions.

”Why both text and HTML?”

Most modern email clients will display the HTML version, not all of them can render HTML — a text fallback makes sure your message is displayed regardless. Furthermore it significantly improves deliverability.

Styling with CSS

To style your HTML in the Message, you should embed your CSS directly inside a <style> tag in the <head> in the payload of the API request. This is the most reliable method for ensuring your styles are applied correctly across different email clients like Gmail, Outlook, and Apple Mail.

Here is an example of a well-structured and styled HTML header:
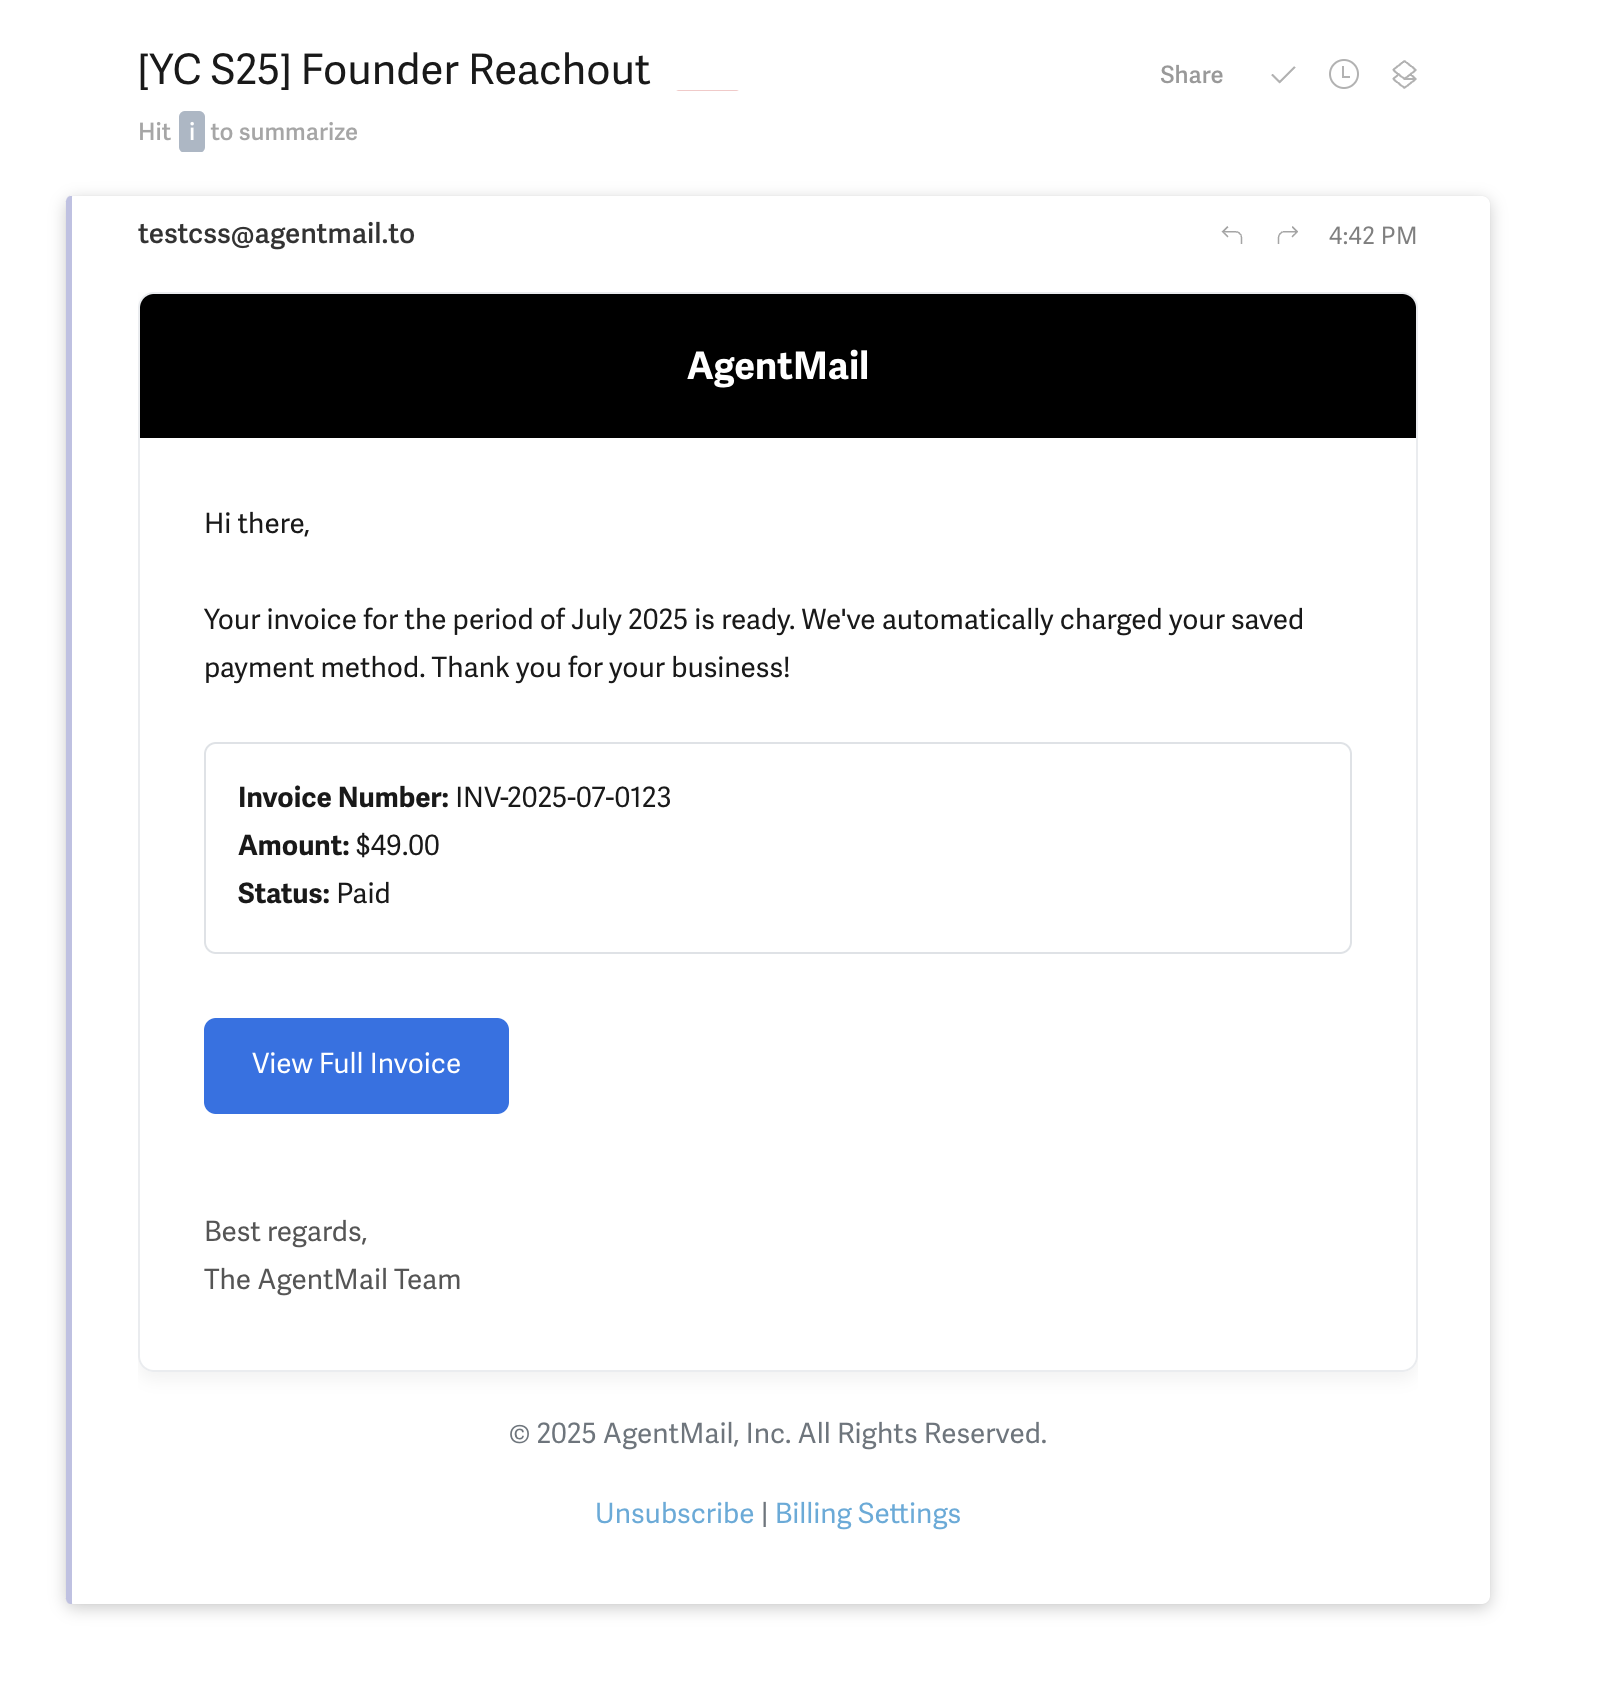
Styled HTML Email Example
1<html>
2 <head>
3 <meta charset="UTF-8">
4 <meta name="viewport" content="width=device-width, initial-scale=1.0">
5 <title>Your AgentMail Invoice</title>
6 <style>
7 body {
8 font-family: -apple-system, BlinkMacSystemFont, 'Segoe UI', Roboto, Helvetica, Arial, sans-serif;
9 line-height: 1.6;
10 color: #333;
11 max-width: 600px;
12 margin: 0 auto;
13 padding: 20px;
14 background-color: #f8f9fa;
15 }
16 .email-wrapper {
17 background: #ffffff;
18 border: 1px solid #e9ecef;
19 border-radius: 8px;
20 box-shadow: 0 4px 8px rgba(0, 0, 0, 0.05);
21 overflow: hidden;
22 }
23 .email-header {
24 background-color: #000000;
25 color: #ffffff;
26 padding: 24px;
27 text-align: center;
28 }
29 .email-header h1 {
30 margin: 0;
31 font-size: 24px;
32 font-weight: 600;
33 }
34 .email-content {
35 padding: 32px;
36 }
37 .greeting {
38 font-size: 18px;
39 font-weight: 500;
40 margin-bottom: 24px;
41 }
42 .main-message {
43 font-size: 16px;
44 margin-bottom: 24px;
45 }
46 .cta-button {
47 display: inline-block;
48 padding: 12px 24px;
49 background-color: #1a73e8;
50 color: #ffffff;
51 text-decoration: none;
52 border-radius: 6px;
53 font-weight: 500;
54 font-size: 16px;
55 margin-top: 8px;
56 margin-bottom: 24px;
57 }
58 .invoice-details {
59 background-color: #f8f9fa;
60 padding: 16px;
61 border-radius: 6px;
62 margin-bottom: 24px;
63 border: 1px solid #dee2e6;
64 }
65 .invoice-details p {
66 margin: 0;
67 font-size: 14px;
68 }
69 .invoice-details strong {
70 color: #000;
71 }
72 .signature {
73 margin-top: 24px;
74 font-size: 14px;
75 color: #555;
76 }
77 .email-footer {
78 text-align: center;
79 padding: 20px;
80 font-size: 12px;
81 color: #6c757d;
82 }
83 .email-footer a {
84 color: #1a73e8;
85 text-decoration: none;
86 }
87 </style>
88 </head>
89 <body>
90 <div class="email-wrapper">
91 <div class="email-header">
92 <h1>AgentMail</h1>
93 </div>
94 <div class="email-content">
95 <div class="greeting">Hi there,</div>
96 <div class="main-message">
97 Your invoice for the period of October 2025 is ready. We've automatically charged your saved payment method. Thank you for your business!
98 </div>
99
100 <div class="invoice-details">
101 <p><strong>Invoice Number:</strong> INV-2025-10-0123</p>
102 <p><strong>Amount:</strong> $49.00</p>
103 <p><strong>Status:</strong> Paid</p>
104 </div>
105
106 <a href="#" class="cta-button">View Full Invoice</a>
107
108 <div class="signature">
109 Best regards,<br />
110 The AgentMail Team
111 </div>
112 </div>
113 </div>
114 <div class="email-footer">
115 <p>&copy; 2025 AgentMail, Inc. All Rights Reserved.</p>
116 <p><a href="#">Unsubscribe</a> | <a href="#">Billing Settings</a></p>
117 </div>
118 </body>
119</html>
rendered css
Look how pretty this message looks!

Receiving Messages

While you can periodically list Messages to check for new emails, the most efficient way to handle incoming Messages for your agents is with Webhooks. By configuring a Webhook endpoint, AgentMail can notify your application/agent in real-time as soon as a new Message arrives, so you can take action on them.