Webhook Setup Guide
Step-by-step guide to configure webhooks.
This guide walks you through the complete process of setting up webhooks to receive real-time notifications from AgentMail. You’ll learn how to create an ngrok account, set up an inbox, configure webhooks, and write a simple webhook receiver.
Prerequisites
Before you start, make sure you have:
- Python 3.8 or higher installed
- An AgentMail API Key
pippackage manager- Basic familiarity with Python and terminal commands
Want something simpler?
Webhooks require a public URL and tools like ngrok. If you’d rather skip that setup, WebSockets give you real-time events over a persistent connection with no external tooling. See the WebSockets quickstart.
Installation
First, install the required Python packages:
Step 1: Setting up account on Ngrok
Ngrok creates a secure tunnel from a public URL to your local development server, allowing AgentMail to send webhooks to your machine during development.
1.1 Create an ngrok account
Visit ngrok.com and click “Sign up” to create a free account.
1.2 Choose your platform and install
After logging in, ngrok will guide you through the setup process. Select your operating system and follow the installation instructions.
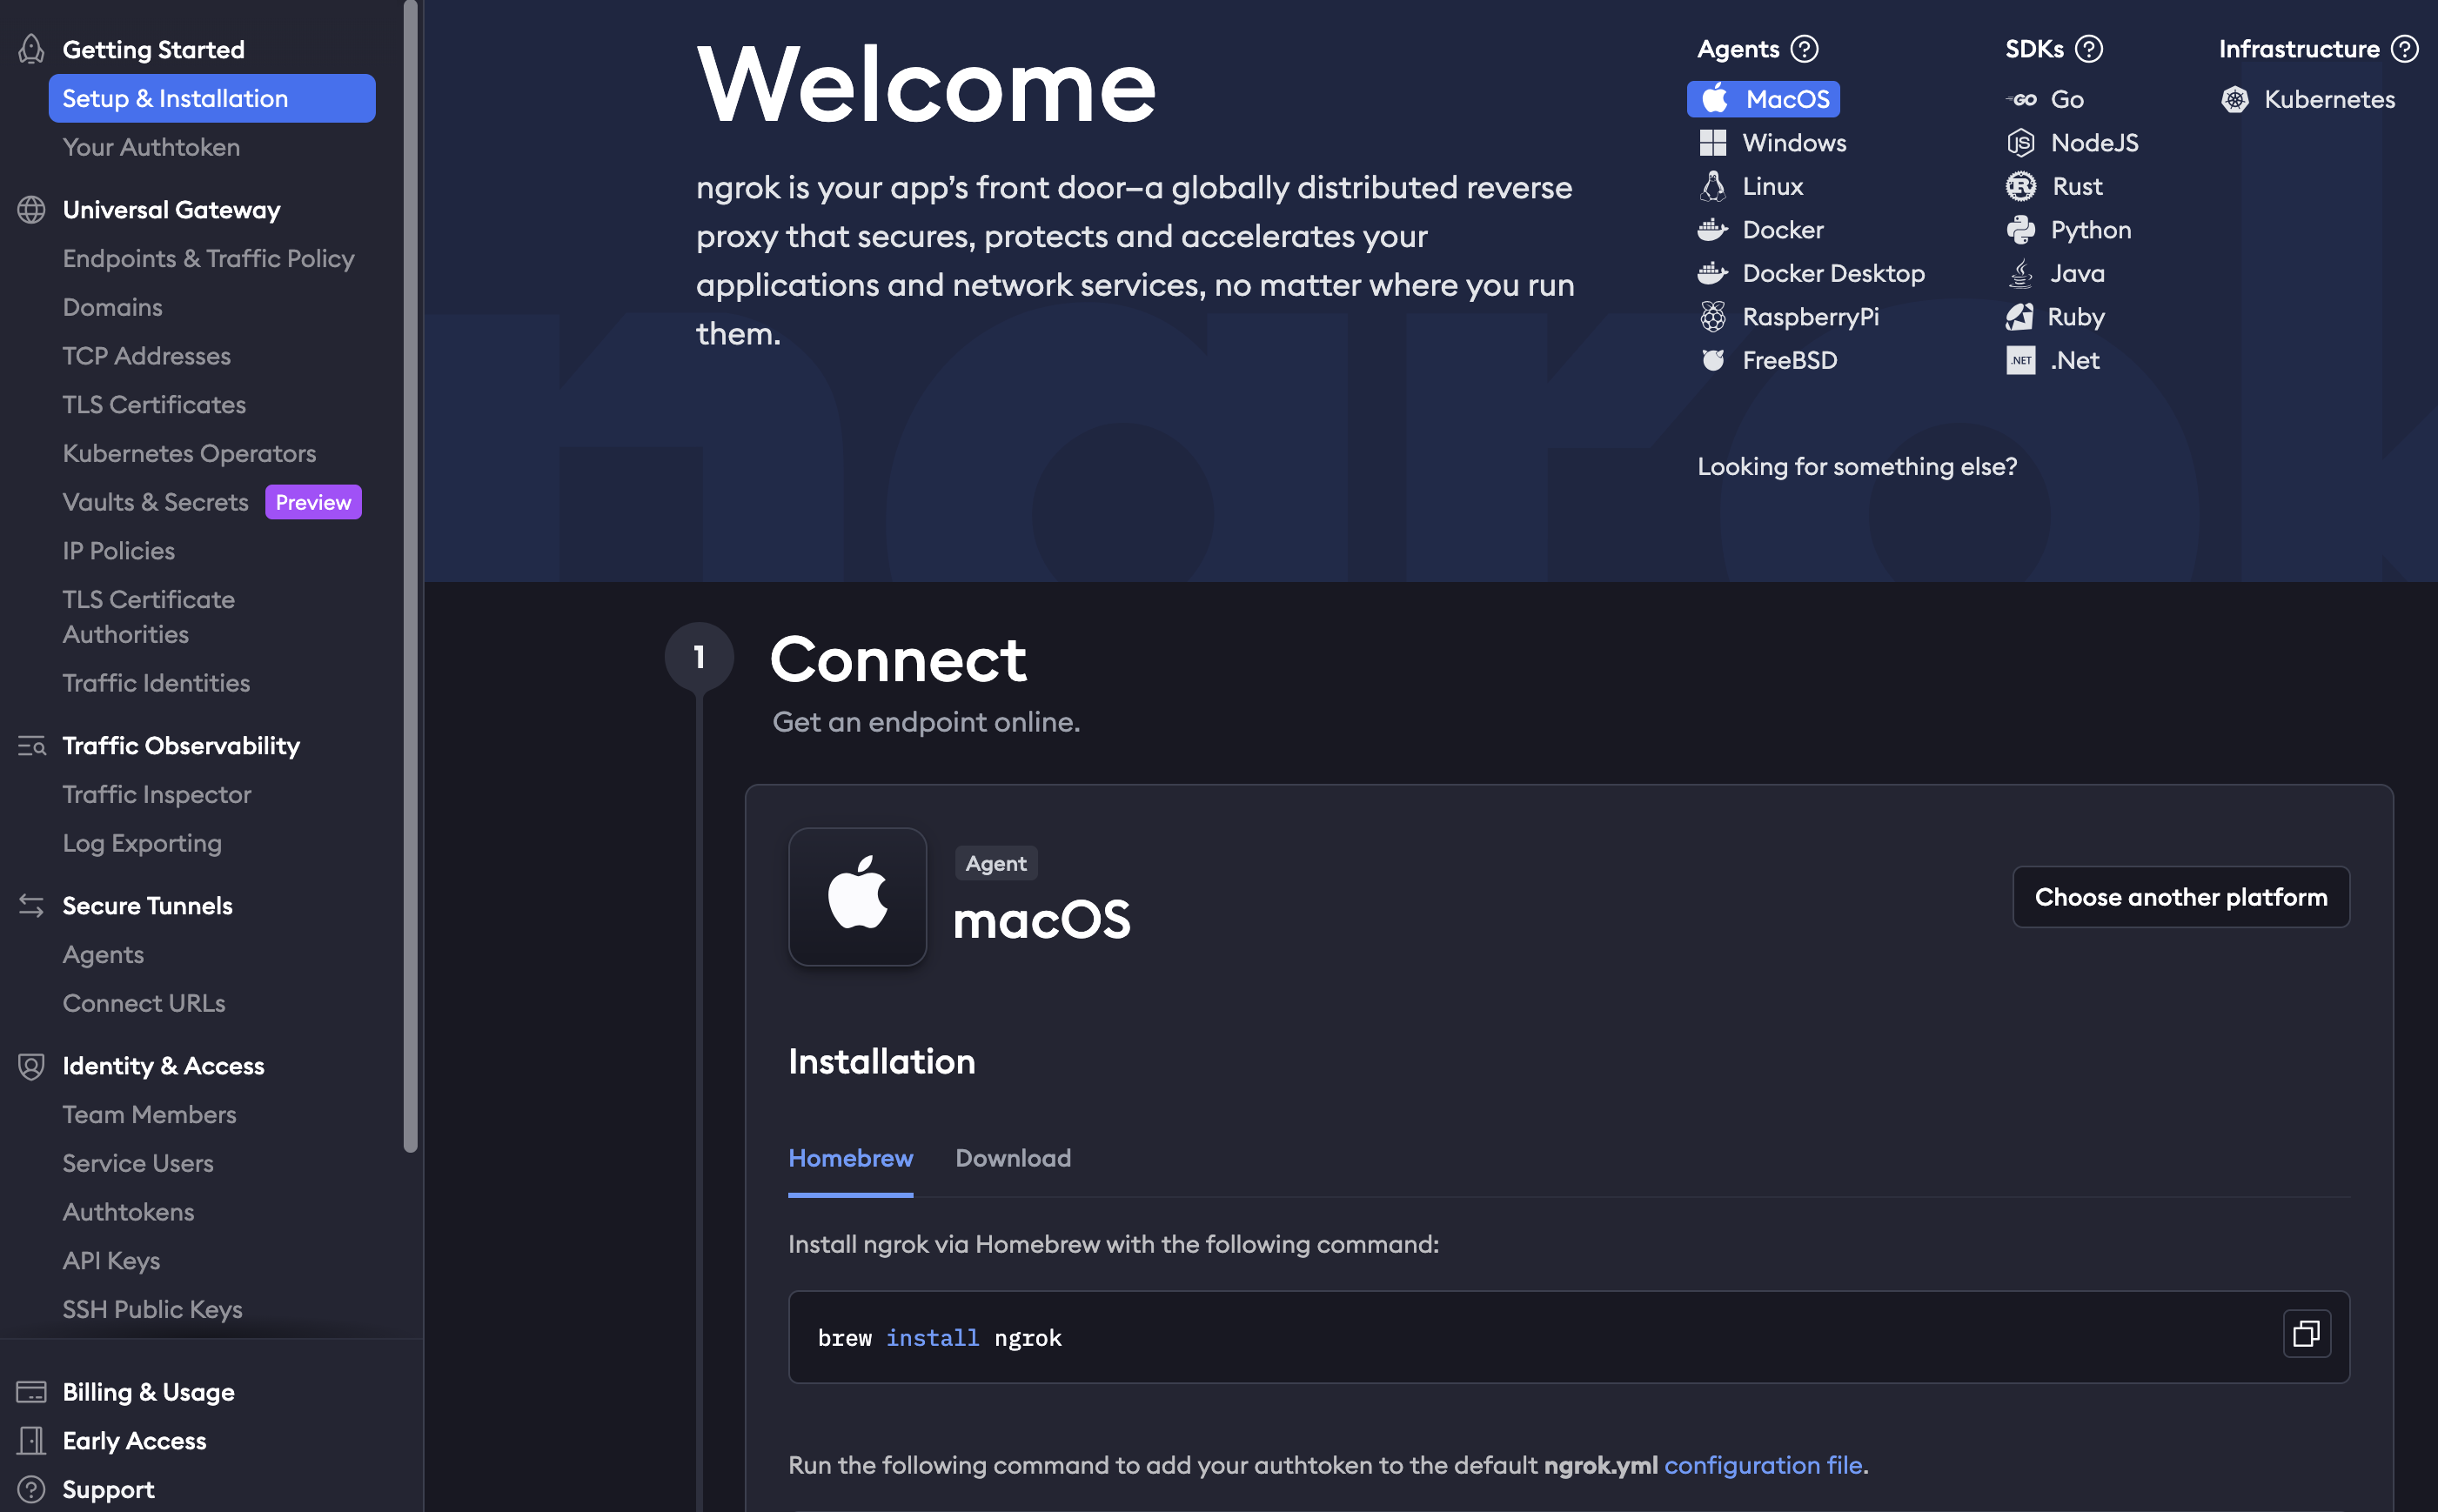
For macOS, you can install ngrok via Homebrew:
After installation, authenticate ngrok with your authtoken (found in your ngrok dashboard):
Step 2: Creating the inbox on AgentMail
Before you can receive webhooks, you need an inbox to receive messages. Create one using the AgentMail API:
The client_id parameter ensures that running this code multiple times won’t create duplicate inboxes. If the inbox already exists, it will return the existing one.
Step 3: Configuring webhook on AgentMail
3.1 Start ngrok tunnel
In your terminal, start an ngrok tunnel to expose your local server (we’ll use port 3000):
You should see output similar to this:
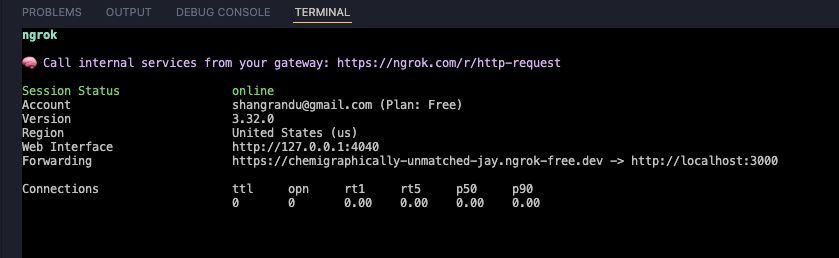
Copy the Forwarding URL (e.g., https://your-subdomain.ngrok-free.app). This is the public URL that AgentMail will use to send webhooks.
Use localhost for testing
When viewing your webhook receiver in the browser, use the http://127.0.0.1:3000 URL shown in the “Web Interface” line, not the ngrok URL. The ngrok URL is only for external services like AgentMail.
Why localhost? Safari is stricter than Chrome/Firefox when viewing development servers through HTTPS ngrok tunnels. Safari blocks local WebSockets and some dev-only scripts, which causes the page to show a loading spinner indefinitely due to Hot Module Replacement (HMR). This is expected development behavior and not a documentation issue. Using localhost or static builds avoids this problem.
3.2 Register webhook with AgentMail
Now register your webhook endpoint with AgentMail:
Step 4: Code example for receiving webhooks
Create a file named webhook_receiver.py with the following code:
Running your webhook receiver
- Make sure ngrok is running in one terminal window
- In another terminal, run your webhook receiver:
- Send a test email to your AgentMail inbox
- Watch the console output for incoming webhook events
Viewing the result
Open your browser and visit http://127.0.0.1:3000 to see the status page confirming your webhook receiver is running:

Testing Your Setup
To test your webhook setup:
- Send an email to your inbox address (e.g.,
webhook-demo@agentmail.to) - Check your webhook receiver’s console output
- You should see the webhook event details printed immediately
Next Steps
Now that your webhook is working, you can extend the receive_webhook() function to:
- Automatically reply to messages
- Process attachments
- Route emails to different handlers based on content
- Integrate with your AI agent workflows
Check out the Event-Driven Agent Example for a more advanced implementation.
Troubleshooting
Webhook not receiving events
- Verify ngrok is running and the forwarding URL matches your webhook registration
- Check that your Flask app is running on the correct port (3000)
- Ensure your webhook URL ends with
/webhooks - Look for errors in both the Flask console and ngrok web interface
Ngrok tunnel disconnects
Free ngrok accounts have 2-hour session limits. The tunnel will disconnect and you’ll need to restart ngrok and update your webhook URL with AgentMail.
Port already in use
If port 3000 is already in use, choose a different port:
- Change the port in
app.run(port=XXXX) - Update the ngrok command:
ngrok http XXXX
Copy for Cursor / Claude
Copy one of the blocks below into Cursor or Claude for webhook setup in one shot.
Production Considerations
For production deployments:
- Use a dedicated server: Deploy your webhook receiver to a cloud service (AWS, GCP, Heroku, etc.) instead of using ngrok
- Implement webhook verification: Validate incoming requests are authentically from AgentMail
- Add error handling: Implement retry logic and error reporting
- Use async processing: Return 200 immediately and process webhooks in background jobs
- Hydrate messages via the API: Webhook payloads are capped at 1 MB. When this limit is exceeded, the
textandhtmlbody fields are omitted from the payload. Use the Get Message endpoint to fetch the complete message content, including the full body and attachments. See Payload size limit for details - Monitor webhook health: Set up logging and alerting for failed webhook deliveries